In a growing facility, your label strategy shapes how people move, how systems behave, and how reliable your data feels day to day. Effective warehouse labeling systems sit at the center of that flow, guiding every inbound, put away, pick, and outbound move.
Whether you are standing up a new building or trying to fix a patchwork of old labels, designing the system carefully the first time saves time, labor, and money later. This guide walks through the core components of a label system that can scale with your warehouse instead of holding it back.
Step 1: Define Your Operational Flow and Labeling Objectives
Before you pick a material or design a template, get clear on what should receive a label and why. Start with the big buckets: racks, aisles, bins, pallets, totes, and individual inventory where needed. Think through each process step, including inbound, staging, put away, pick, pack, and outbound, and note where a person or a scanner needs guidance or confirmation. That list becomes the backbone of your early planning.
Next, align labels with the physical layout and movement patterns in the building. Map how product flows from receiving to storage to picking lanes and shipping, and decide where warehouse labels will act as wayfinding tools, confirmation points, or traceability anchors. Aisle and bay signs should work hand in hand with location tags and floor markings, so pickers and drivers can follow a logical route without guessing. When labels match workflow, scanners see what the WMS expects and people move with fewer delays.
Step 2: Choose Materials for Warehouse Rack Labeling and Storage Areas
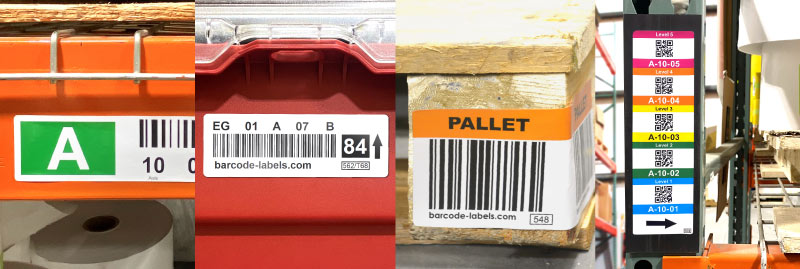
Once you know what needs identifiers, match materials to where those identifiers live. Racks, mezzanines, floor positions, and bulk storage all see different levels of traffic, impact, and exposure. In cold storage, label facestock and adhesive need to tolerate freezing temperatures and condensation. In high traffic dock or cross-dock areas, labels face abrasion, pallet impact, and constant handling. On outdoor or semi-exposed yards, UV and weather become key factors.
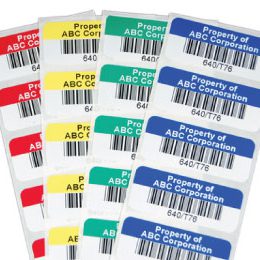
Surfaces drive material choice as much as environment. Steel uprights, painted beams, plastic totes, and corrugated cartons all interact differently with adhesives. For long term warehouse rack labeling, you may need durable polyester or vinyl constructions with aggressive adhesive that resists bumps and cleaning. For short term pallet or tote applications, removable options may be better so containers stay clean for future use. Testing samples on real surfaces under real conditions helps you confirm which combinations deliver the life span and cleanability you need.
Step 3: Design Each Inventory Label for Scan Efficiency and Visual Clarity
With locations and materials mapped, you can focus on how each inventory label will look and function. Start by balancing human readability with scanner readability. Barcodes should be large enough for your scan distance and framed by a quiet zone of clear space. Use strong contrast between the code and the background, and avoid glossy finishes in spots where lighting could produce glare. Above or below the code, print human readable text that includes the location ID or SKU in a simple, legible font.
Format consistency matters more than decoration. Establish rules for label size, font choices, and placement of key data so that a rack tag in one zone looks and behaves like a rack tag anywhere else. For warehouse barcode design, work with your WMS or EWM team to choose the right symbology and data structure. Keep the payload as simple as possible for fast decode and integration, and avoid overloading the code with extra characters that do not serve an operational need. The label should tell systems and people exactly what they need to know, no more and no less.
If you are planning or reworking your design and want a sounding board, Electronic Imaging Materials can walk through your concepts and highlight practical tweaks that will improve print quality, durability, and scan performance.
Step 4: Protect Inventory Location Accuracy Over Time
A good design on paper still needs solid standards to hold up in the field. To protect inventory location accuracy year after year, document clear labeling rules and layout templates. Decide how you will encode aisles, bays, levels, and positions, and write down how those elements appear on signs and labels. Create template files for major label types and keep them controlled, so teams do not improvise one-off designs that drift away from the standard. These decisions give you a framework that can handle expansion, mezzanines, and new zones without reinventing the system.
Placement and maintenance protocols matter just as much. Define where labels should sit on each beam, post, bin, or floor position and how installers should orient them. Then train installation teams to follow those rules, so labels land in the same place and angle across all aisles. Regular walk-throughs to spot peeling tags, damaged prints, or blocked signs keep the system clean. When you treat labeling as part of sustaining inventory location accuracy, you reduce mispicks, speed up counts, and make audits easier.
Step 5: Test, Validate, and Maintain Your Warehouse Labeling System
Before a full rollout, test your planned setup in real working conditions. Install a small pilot set of labels across several aisles, zones, or storage types, and have operators use them during normal shifts. Watch how pickers, forklift drivers, and receivers interact with the labels. Check scan performance from expected angles and distances, both from the floor and from equipment. Adjust font sizes, label placement, or barcode orientation if people need to bend, reposition, or rescan frequently. Those small changes can make a big difference at scale.
Once the pilot feels solid, document the combination of materials, printer settings, templates, and installation practices that produced success. That documented package is your blueprint for expanding to the rest of the building and to future facilities. When you think of warehouse labeling systems as living infrastructure rather than a one time project, it becomes natural to schedule periodic reviews, refresh worn labels, and update standards as operations and automation evolve.
Step 6: Partner with a Supplier That Understands Systems
Vendors play a big role in how your system performs over its life. A partner that understands warehouse labeling systems can help you make better decisions at each stage, from early planning to later expansions. Instead of simply taking orders, the right supplier will ask how your WMS is structured, how you pick and put away, what automation you use, and where you have seen labels fail in the past. Those answers shape recommendations on materials, adhesives, and formats.
Electronic Imaging Materials supports teams with design input, material engineering, and practical field experience. The Label Experts can collaborate on prototypes, supply test runs for different zones, and adjust constructions for demanding areas like freezers, high bays, or outdoor storage. As your operation grows, they can scale print production, refine templates, and help you integrate new automation or software with your existing label strategy. That kind of support turns a collection of labels into a coherent system that stays aligned with how your warehouse works.
Build the System Once, Scale It for Years
A thoughtful label design process pays off in fewer delays, fewer mispicks, and smoother interactions between people, scanners, and software. When you approach warehouse label planning as part of your core infrastructure, you create a foundation that supports future automation, new product lines, and added capacity without constant rework. The result is a cleaner floor, more confident operators, and more reliable data feeding every decision.
If you are planning a new building or overhauling an existing layout, Electronic Imaging Materials can help you design for growth instead of just day one functionality.
Design a warehouse label system that works today and grows with you tomorrow.
Connect with our team today for expert guidance and free label samples designed to meet your specific needs.