If you’ve ever dealt with peeling, smudged, or unreadable labels in a cryogenic freezer, you know how frustrating that can be. It wastes precious time and poses real risks to sample integrity and research validity. Frozen tube labels play a pivotal role in ensuring your lab’s workflow remains seamless, accurate, and compliant. Yet, the path to reliable labeling isn’t always obvious. This guide shows you how to apply your labels correctly, minimizing the chance of peeling, fading, or confusion down the line.
Why Proper Label Application Matters
In a busy lab environment, it’s tempting to slap on labels and move on. However, minor oversights at this stage can lead to big headaches later. Frozen tube labels face tough conditions—extreme cold, possible freeze-thaw cycles, and frequent handling by gloved technicians. If improperly applied, they can peel, smudge, or become illegible, jeopardizing the accuracy of your work and potentially causing you to discard precious samples.
The importance of a solid labeling approach becomes even clearer when you factor in compliance and inventory requirements. When your labeling is top-notch, you can quickly pinpoint where each sample goes, how old it is, and who’s responsible for it—all of which are crucial for maintaining the integrity of research results or clinical data.
Pre-Labeling Preparations
Before you start affixing frozen tube labels to your vials or cryo-tubes, it’s vital to organize your workspace and materials. Pre-labeling prep might seem like an extra step, but spending five minutes on organization now can save hours of troubleshooting later.
- Clean and Dry Tubes: Dust, moisture, or residue on the tube’s surface can impede label adhesion. If time allows, bring tubes to room temperature before wiping them with an alcohol pad or sterile wipe. Then let them dry completely. Alternatively, purchase material that adheres to frosty pre-frozen tubes with no preparation needed.
- Organize Your Labels and Materials: Keep your labels in a cool, dry area until use. Exposure to humidity or direct sunlight can compromise adhesive strength.
- Check Your Printer and Ribbon: Make sure your printer settings are calibrated for the type of label material you’re using. Resin-based ribbons are often recommended for lab applications, especially if you’re dealing with extreme cold.
- Plan for Speed and Accuracy: Labeling a large batch of tubes? Consider grouping them by project or storage temperature. This approach saves time and reduces confusion.
Choosing and Printing the Right Frozen Tube Labels
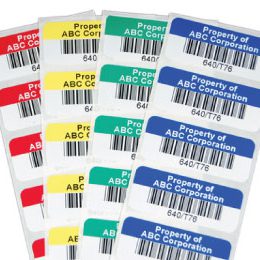
Selecting the correct label stock and adhesive can make or break your labeling efforts. Not all labels are designed to withstand cryogenic conditions, so be sure to invest in specialized frozen tube labels that won’t become brittle or fall off in ultra-low temperatures.
Types of Cryogenic Materials
- Polyester: Offers excellent durability and temperature resistance, making it ideal for repeated freeze-thaw cycles.
- Polypropylene: Provides strong chemical resistance and can handle moisture well.
- Specialized Laminates or Coatings: Some labels come with a protective coating to guard against condensation and abrasion.
If possible, opt for a thermal transfer printer when printing your labels. The combination of high-quality ribbon and appropriate label material ensures that text, barcodes, and graphics remain crisp.
Remember: The best label on paper can fail if your printer settings aren’t dialed in. Calibrate your print speed, heat settings, and pressure to match the label manufacturer’s recommendations for the perfect print every time.
Phil B. | OriGen Biomedical
“The customer service is always exceptional, the quality of the labels and the turn-around time is amazing.“
The Role of a Label Applicator in Quality Assurance
Using a label applicator can significantly improve label placement consistency. Especially for labs processing hundreds—or even thousands—of tubes in a short timeframe, a manual application can introduce inconsistencies. An applicator ensures each label aligns perfectly around the tube’s circumference, smoothing out bubbles or wrinkles.
Key Benefits
- Speed & Efficiency: Automated or semi-automated devices streamline the process, saving technician hours.
- Uniform Adhesion: A label applicator reduces the likelihood of edge lift or peeling by applying even pressure around the tube.
- Reduced Errors: Minimizes crooked or partially applied labels, leading to more reliable scans and visual checks.
If your lab deals with high volumes of cryo tubes, investing in a label applicator might be a game-changer, especially when using specialized lab labels designed to endure sub-zero settings.
5. How to Apply Lab Labels
Properly applying lab labels is crucial for ensuring strong adhesion, readability, and long-term durability. Following a step-by-step process helps prevent peeling, misalignment, or barcode scanning issues.
Step 1: Gather Your Materials
Have your tubes, labels, and necessary tools (like wipes or a label applicator) within arm’s reach. Working in a clean environment is essential—dust or debris can quickly interfere with adhesion.
Step 2: Prepare the Tube Surface
Unless the label is engineered for frosty tubes, ensure the tube is at the appropriate temperature for labeling. If it’s been in a freezer, consider leaving it at room temperature for a short period so you can wipe away any frost. Always let the tube surface dry thoroughly before proceeding.
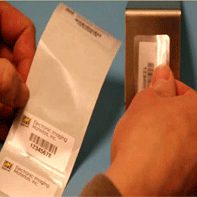
Step 3: Peel the Label Carefully
Avoid touching the adhesive side with your fingers, as oils can compromise the bond. Instead, hold the label by its edges.
Step 4: Align and Press
Place the label so that it aligns evenly with the tube. If you’re not using a label applicator, use your thumb and forefinger to press down from the center outward, smoothing out any air pockets or bubbles.
Step 5: Check for Completeness
Make sure the edges are fully sealed and the label’s text or barcode is unobscured. If you’re using laboratory barcodes, perform a quick scan test to ensure it’s readable.
Step 6: Cure and Store
Some adhesives take a few minutes to form a strong bond. Whenever possible, let the newly labeled tubes sit at room temperature for that duration before moving them back into cold storage. This extra step can dramatically improve adhesion strength over the life of the sample.
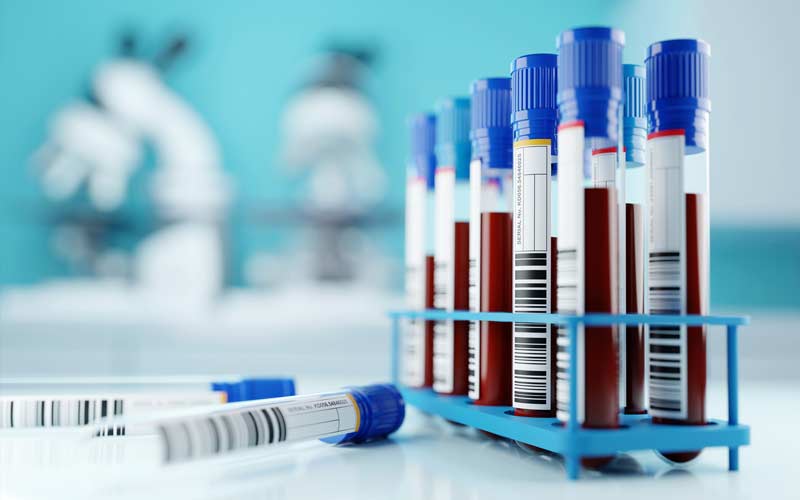
6. Integrating Laboratory Barcodes for Efficient Tracking
For many labs, labeling goes beyond simple text. Incorporating laboratory barcodes transforms your tube labeling system into a robust data management tool. Barcodes eliminate the need for manual data entry, lowering the risk of transcription errors and speeding up inventory checks.
Best Practices for Barcode Integration
- Choose the Right Format: 1D or 2D barcodes each have advantages. 2D barcodes (like DataMatrix codes) can hold more information in a smaller space.
- Test Scannability Pre-Freezing: A barcode that scans at room temperature should also scan when the tube is frozen, provided you use the right label materials and adhesives.
Link to a LIMS: A Laboratory Information Management System (LIMS) can automatically log data every time you scan a tube, allowing for near-real-time tracking of sample status..
Is your lab struggling with inconsistent labeling or peeling stickers in cryogenic storage? EIM offers expert insights on creating a labeling system that withstands even the toughest conditions. From specialized adhesives to comprehensive barcode integration, our experts can guide you toward the best frozen tube labels.
7. Ensuring Long-Term Reliability After Application
Ensuring long-term reliability of frozen tube labels requires regular spot checks, monitoring for freeze-thaw damage, and keeping tracking systems updated to maintain sample integrity.

Post-Label Checks
Once the tubes are back in the freezer, your work isn’t done. Conduct periodic spot checks, ensuring labels remain fully adhered and legible. If you notice any early signs of peeling, investigate and address the root cause—whether it’s inadequate pressure during application, moisture on the tube, or suboptimal materials.
Freeze-Thaw Cycles
If your samples undergo frequent freeze-thaw cycles, your frozen tube labels face additional stress. Check for micro-tears or fading in the print. Synthetic label materials usually hold up well, but even the best labels can degrade over time if conditions are extreme.
Data Management Updates
Whenever you add or remove samples, updating your tracking software or LIMS ensures real-time accuracy. If you’re using laboratory barcodes, each scan can automatically adjust your lab’s inventory, letting you see at a glance exactly how many tubes remain in storage.
8. Keep Your Research on Track
Applying frozen tube labels might seem straightforward at first glance, but nailing down every detail pays dividends. Whether you’re performing groundbreaking research or handling sensitive patient samples, consistent labeling can mean the difference between smooth sailing and hours of frustration. Focusing on preparation, the right materials, proper application, and routine checks positions you to maintain sample integrity from the moment it’s sealed to the time it’s examined—no matter how cold things get.
Remember, a little extra effort now spares you from scrambling to relabel tubes or salvage mislabeled data later. This step-by-step approach is designed to reduce missteps, help you impress compliance auditors, and boost overall efficiency in your lab workflow.
Electronic Imaging Materials—Your Partner in Frozen Labeling
Ready to simplify your labeling process while boosting accuracy and compliance? Reach out and let us help you build a reliable, future-proof labeling strategy that keeps your samples—and your sanity—in check..