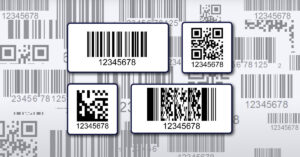
Artwork Requirements At A Glance:
If you want EIM to print labels for you, here are some guidelines for submitting full color artwork. Scroll down for more detailed information on how to provide the best possible source artwork and illustrations for us to produce your labels.
FILES ACCEPTED
TIFF, PDF, EPS, and high resolution JPEG images

Formats Accepted
Illustrator & InDesign Files: Must be converted to a PDF or EPS Format.
Photoshop Files: To get the highest print quality, it is best to save your files as TIFF files. High resolution JPEG files are acceptable if they meet the resolution standard. EPS files can also be used, but they will be converted to PDF before being printed.
ARTWORK REQUIREMENTS
Vector artwork is preferred (we do take raster)

4-Color Process Printing:
All artwork must be created in CMYK format. If you need specific color matching, please provide a sample to color match too.
FONT REQUIREMENTS
In vector (PDF or EPS) files, we recommend all fonts be outlined (see how below in the detailed requirements section) to guarantee they retain the original look you desire when opening on various computers.

How to upload
EIM can pick up large files at your FTP site or file sending service or accept smaller files that total 15 MB or less via email. If you need to send larger files, please contact labelexperts@eiminc.com for instructions. Before sending, we recommend placing multiple files into a single ZIP archive to save time and keep files organized.
Printing Colors
Click to learn more
Please submit in CMYK (RGB works but you may see color differences due to converting)
*If you need specific color matching, please provide a sample to color match too.
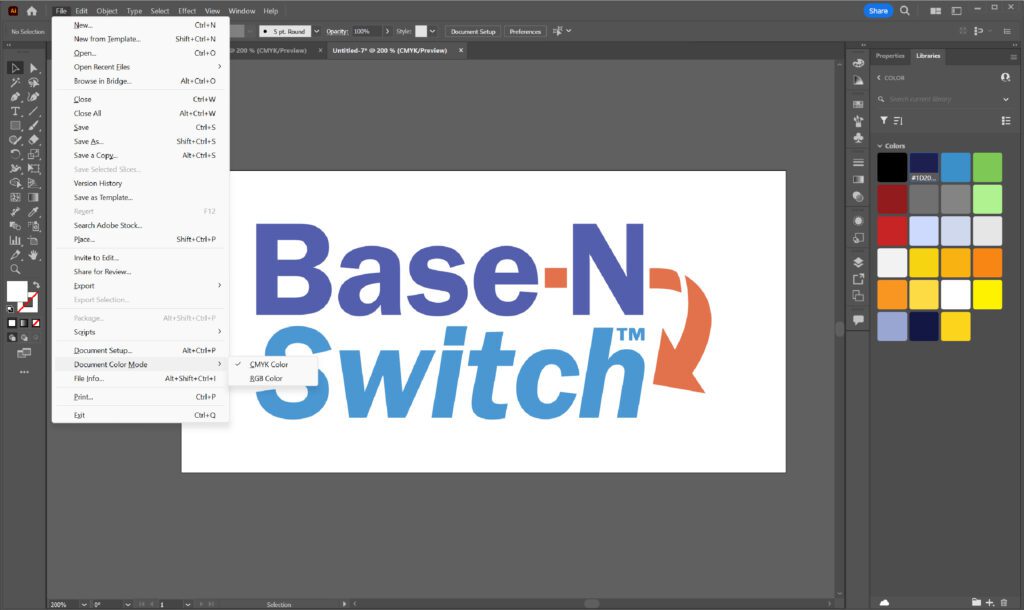
To adjust your color mode in ILLUSTRATOR, go to File and hover over Document Color Mode.
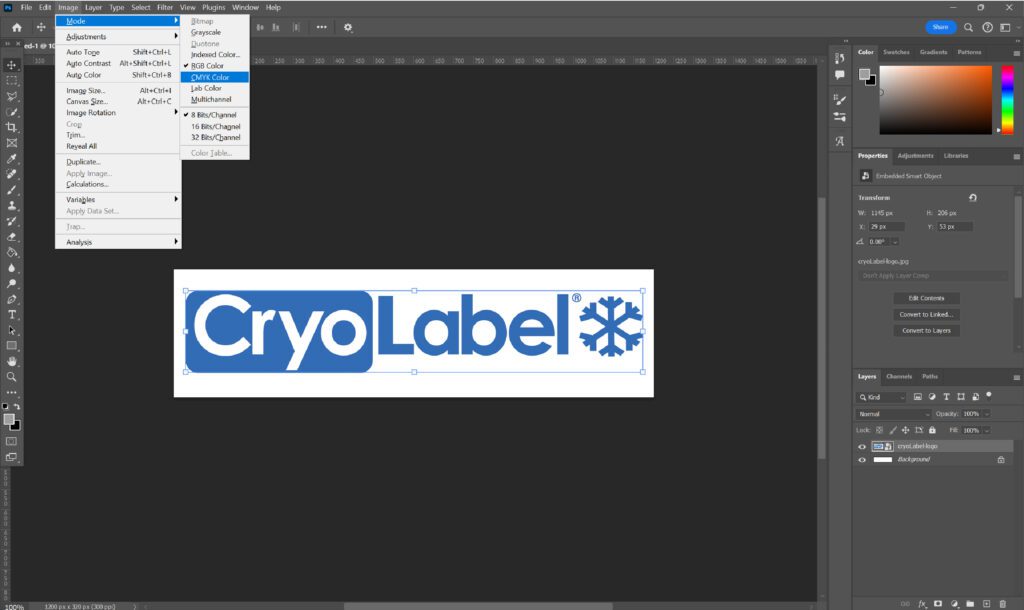
To adjust your color mode in PHOTOSHOP, go to Image and hover over Mode.
Fonts
Click to learn more
ILLUSTRATOR Fonts: All fonts must be OUTLINED in your artwork to preserve your text when the file is opened on a computer that may not have access to your particular font.
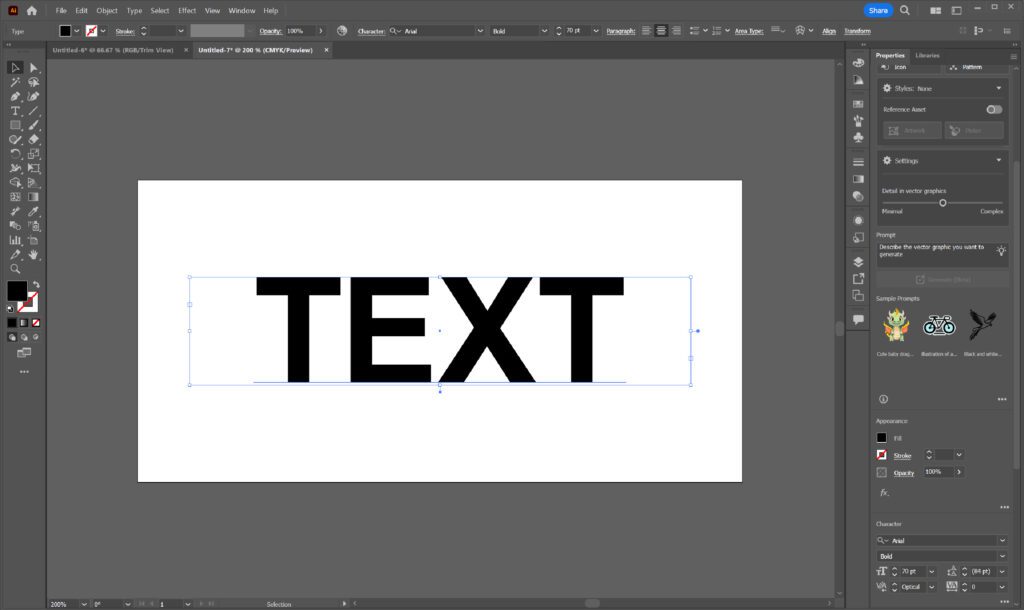
When outlining text, make sure that the desired text is selected.
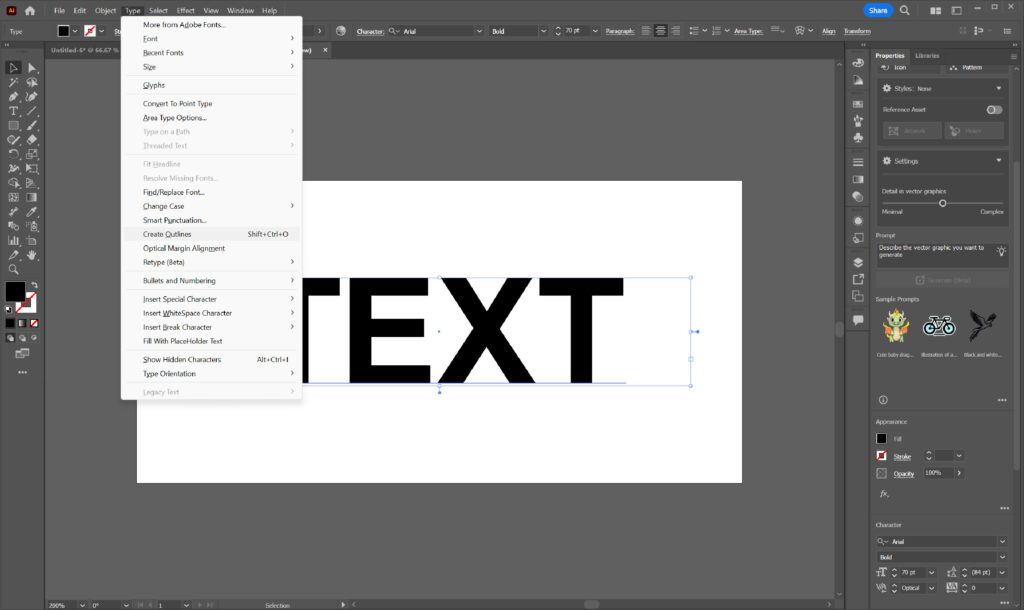
Go to the TYPE drop-down on the top tool bar, then click CREATE OUTLINES. Your text will now be outlined and preserved.
PHOTOSHOP Fonts: As with ILLUSTRATOR fonts, all PHOTOSHOP fonts must be OUTLINED to preserve your text should your file be opened on a computer that does not have your font
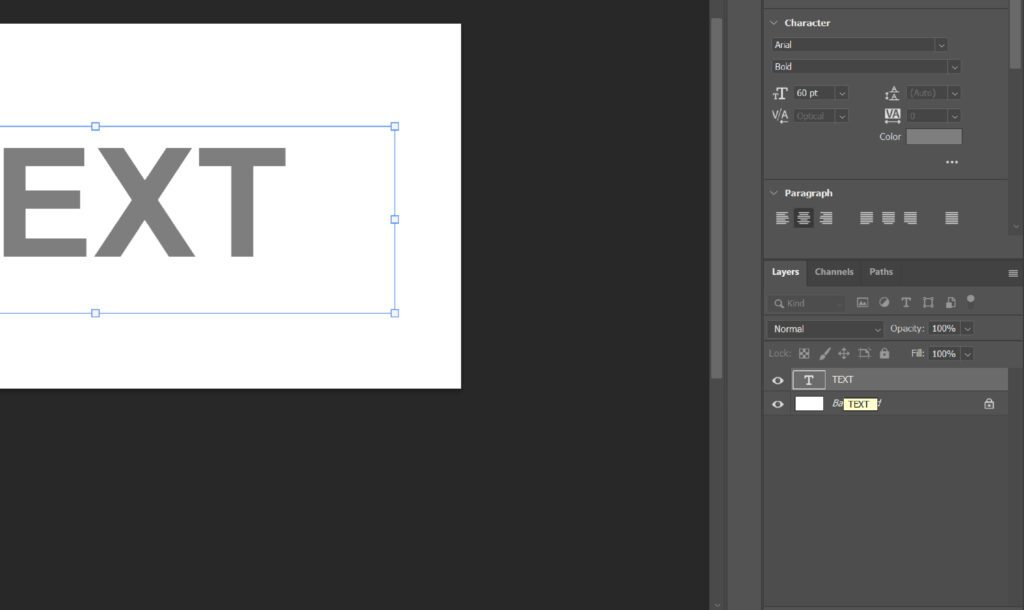
When outlining text, make sure that the desired text LAYER is selected.
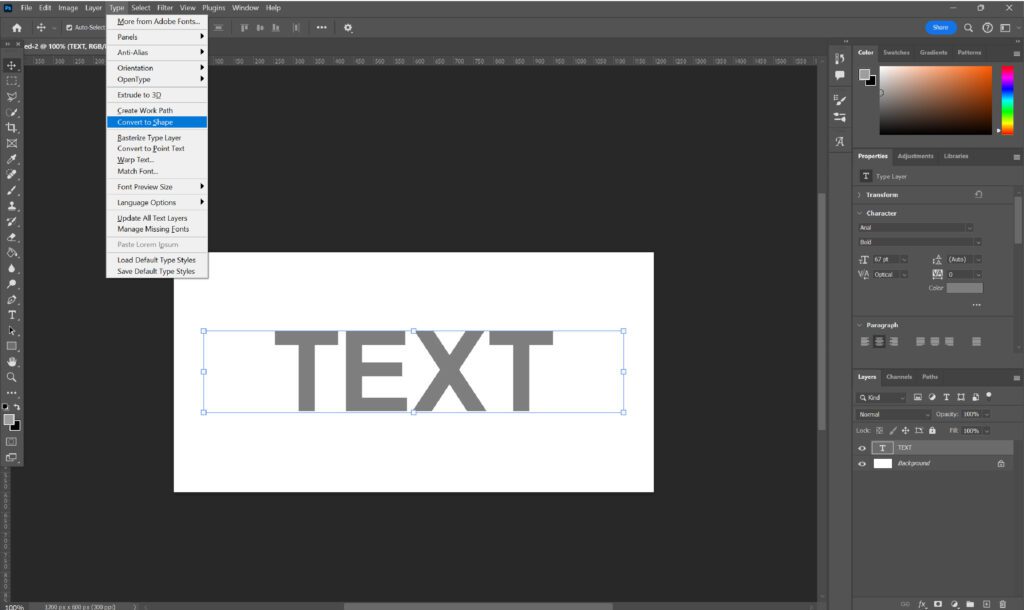
Go down to TYPE, then over to CONVERT TO SHAPE. The TYPE will no longer be Text, but rather a Shape. Note: Not applicable when saving as a jpeg or tiff.
Artboard
Click to learn more
ILLUSTRATOR Art Board: Art board must be the size of the desired label. If you are supplying COMPLETE, print ready artwork, make sure the art board is the exact label size.
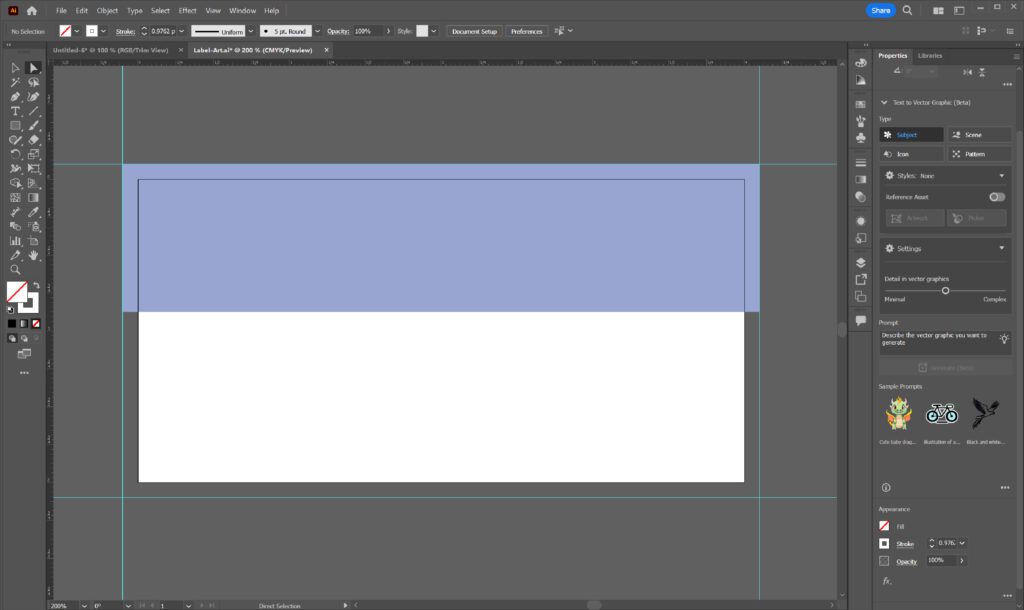
If your label involves any kind of bleed – anywhere on the label – make sure that there is a 0.10” bleed on all sides of label.
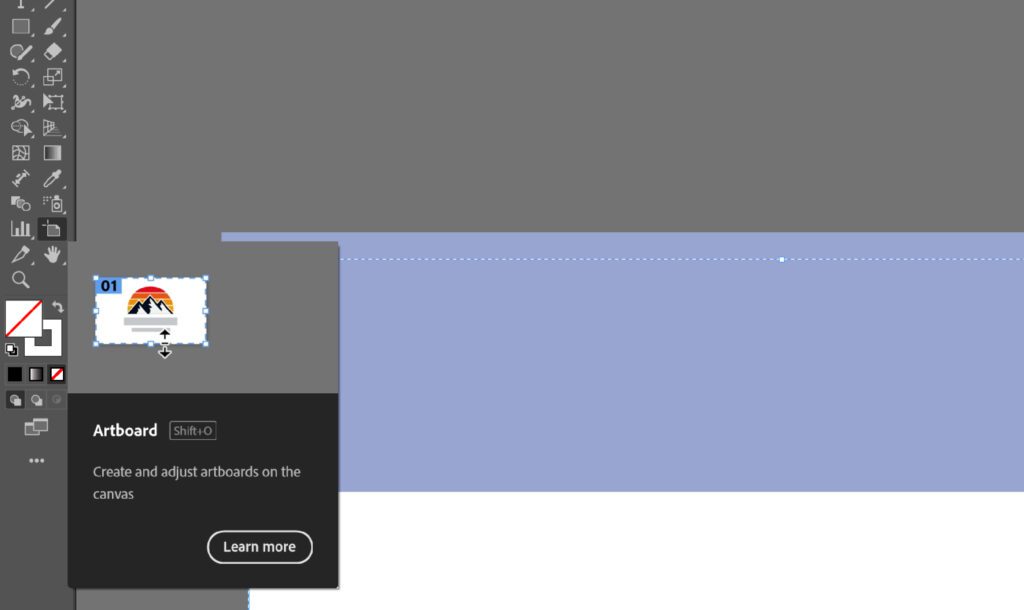
To adjust your Art Board after artwork is created, select the Art Board tool in the tool bar to the left of your screen.
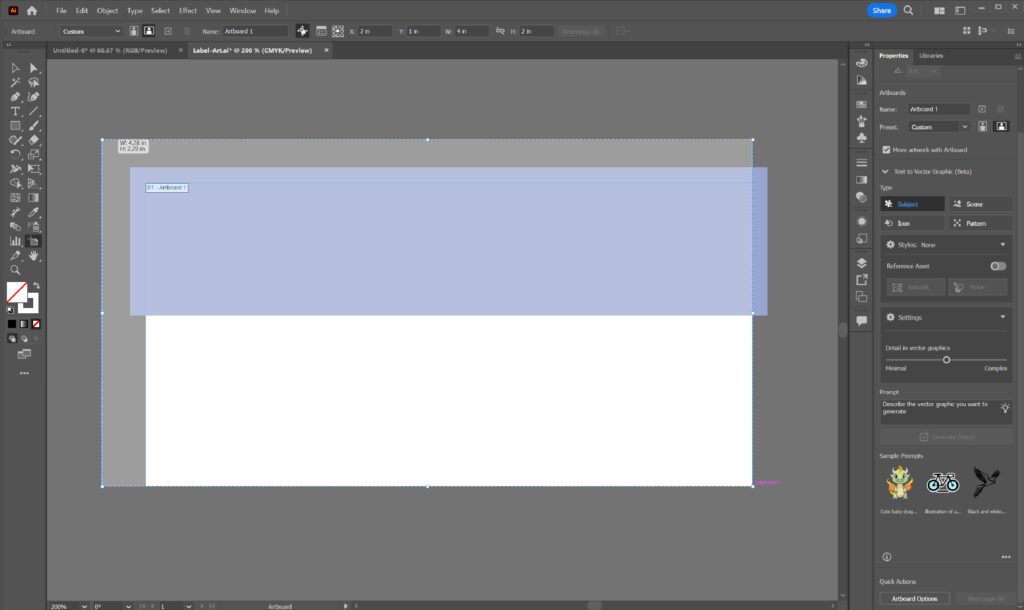
With the regular black arrow, you can make it the size you need.
PHOTOSHOP Art Board: This works much like ILLUSTRATOR Art Board. Art board must be the size of the desired label.
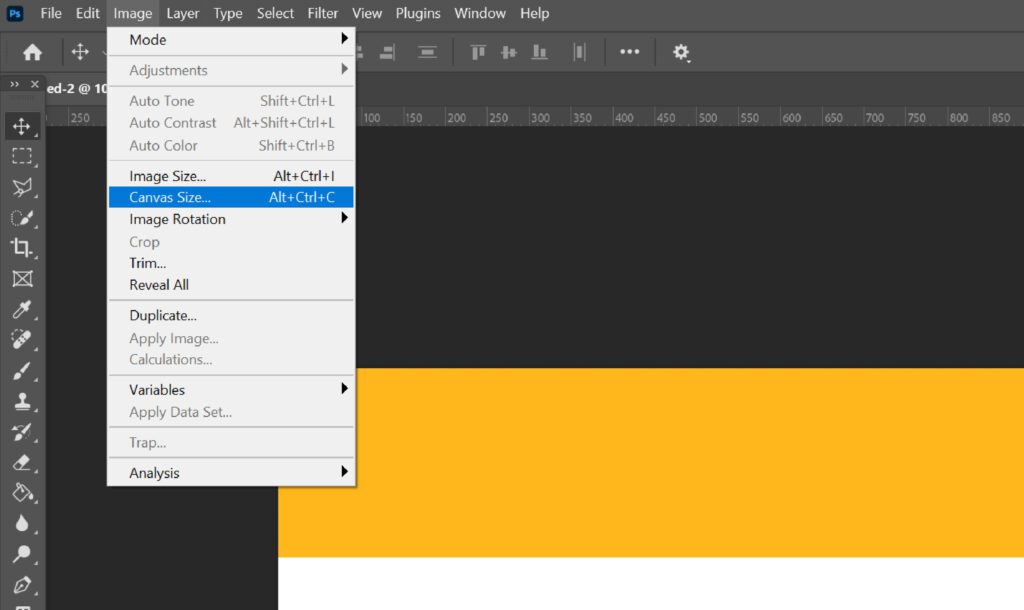
To adjust your Art Board after artwork is created, go to the top tool bar and select IMAGE, CANVAS SIZE.
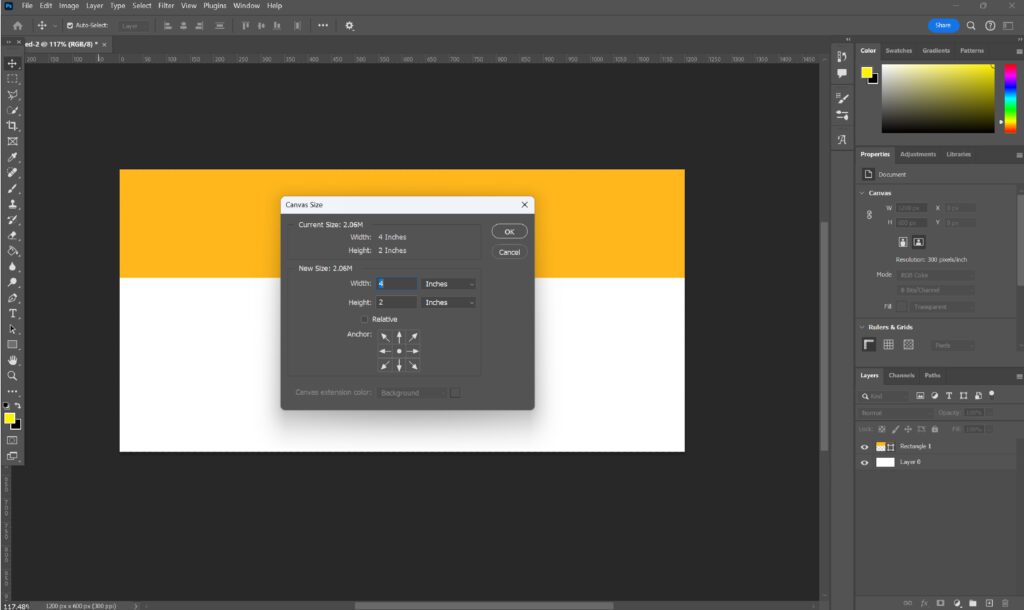
Adjust it to the desired size.
Saving Your File
Click to learn more
BEFORE Saving Your File – Double Check Your Work
- Did you check your SPELLING? See how below.
- Did you create your artwork in Illustrator or Photoshop?
- Is the file set up in CMYK colors with a 360 dpi resolution or a vector file?
- Are the Spot colors PANTONE solid to process?
- Is the Art Board the correct size? Bleed?
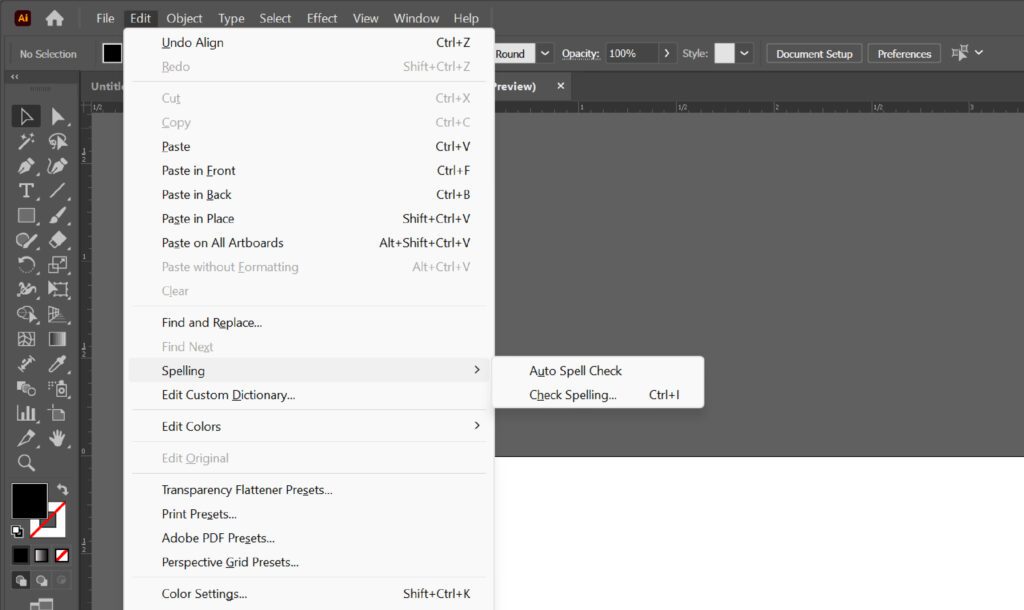
In both ILLUSTRATOR and PHOTOSHOP, the SPELL CHECK is found in the EDIT tab on the top tool bar.
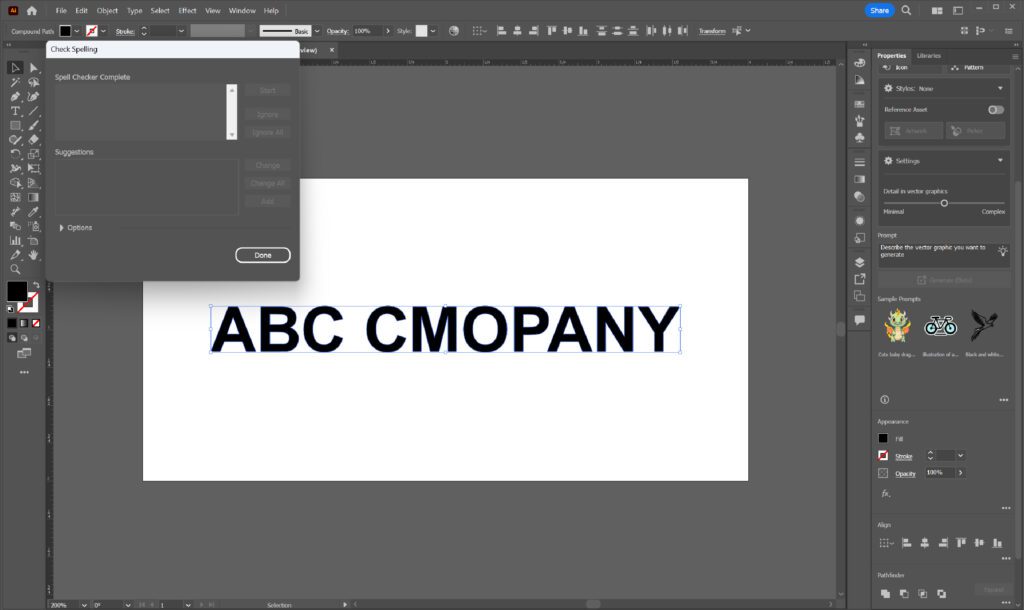
Note: Once font is outlined, spell check will not work. For a more accurate spell check, we suggest using WORD or having someone proofread your work.
ILLUSTRATOR Saving Your File
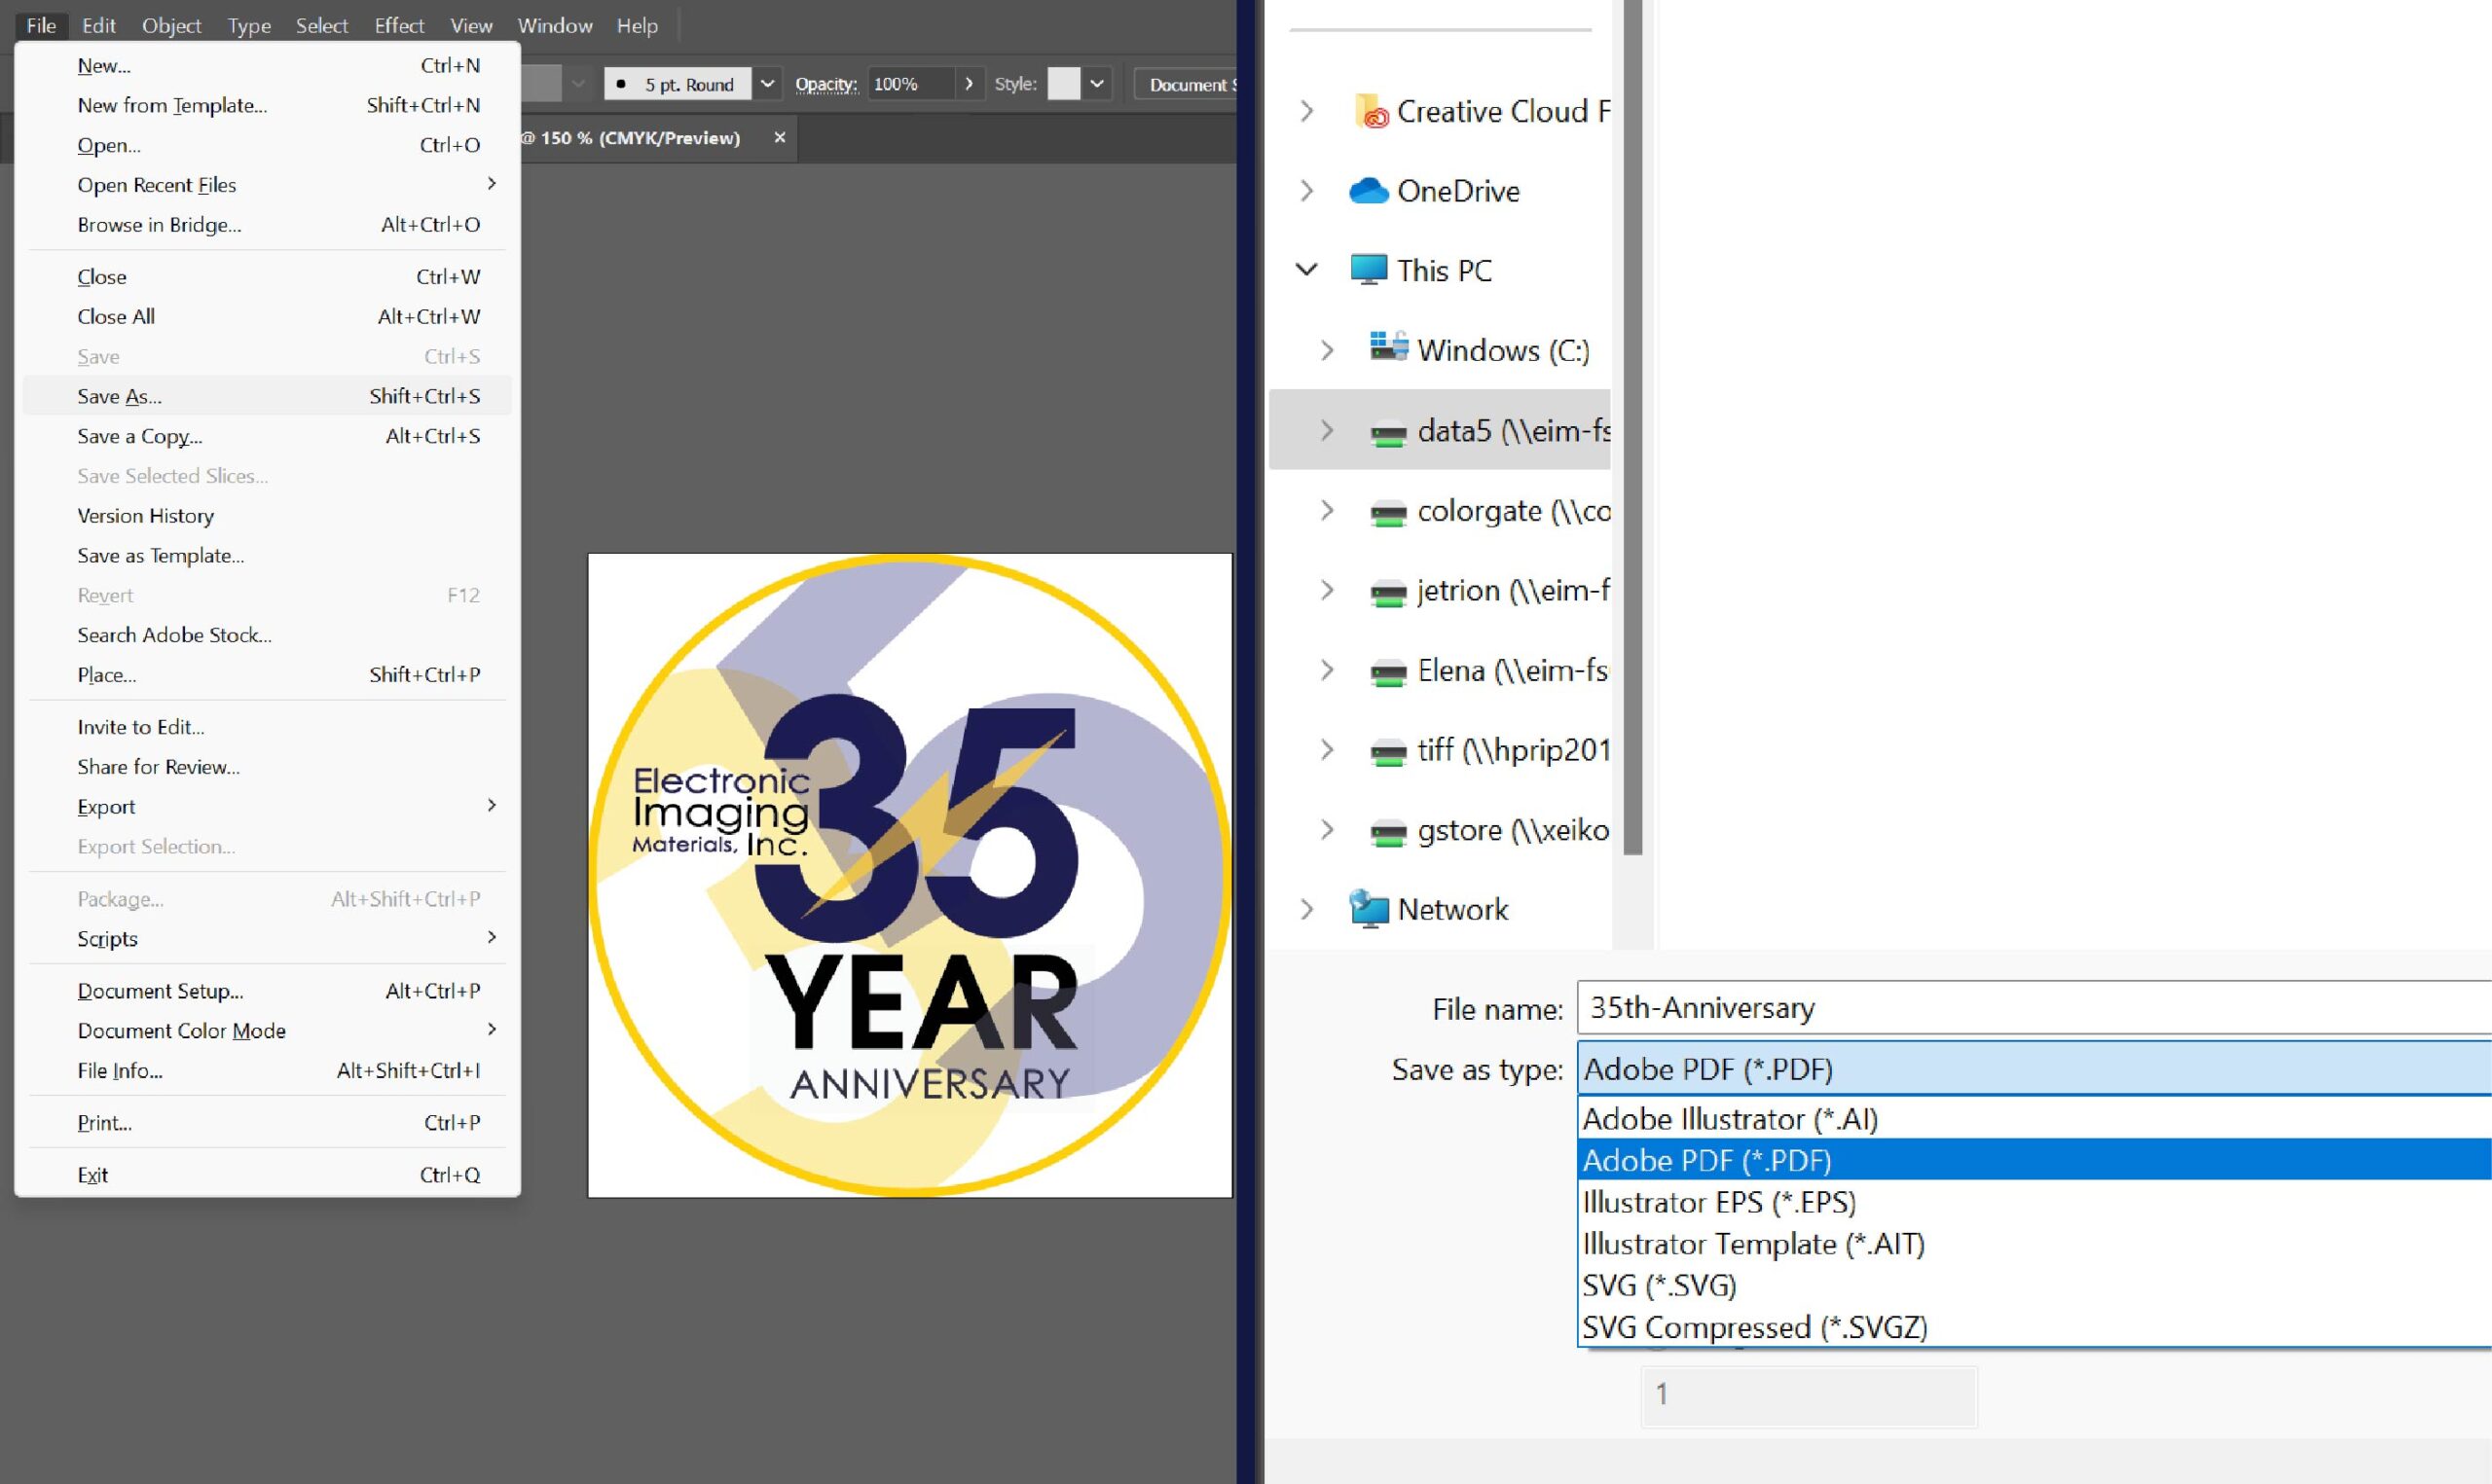
When saving go to File, Save As, Adobe PDF. For a file name, use the product name as stated on your order and click SAVE.
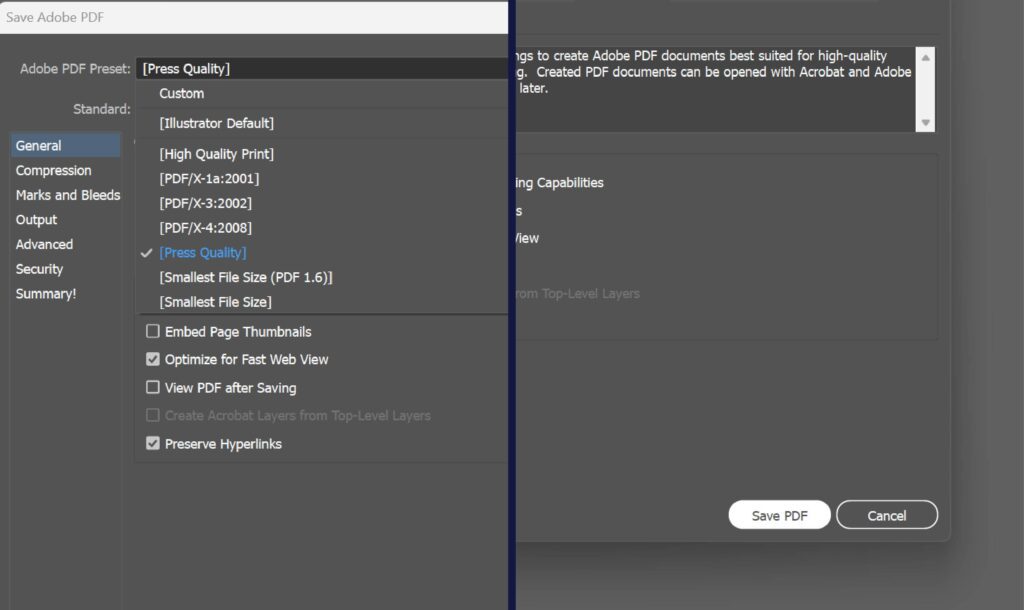
Choose PRESS QUALITY for the Adobe PDF Preset. Click SAVE again and then file is ready to send.
Photoshop Saving Your File
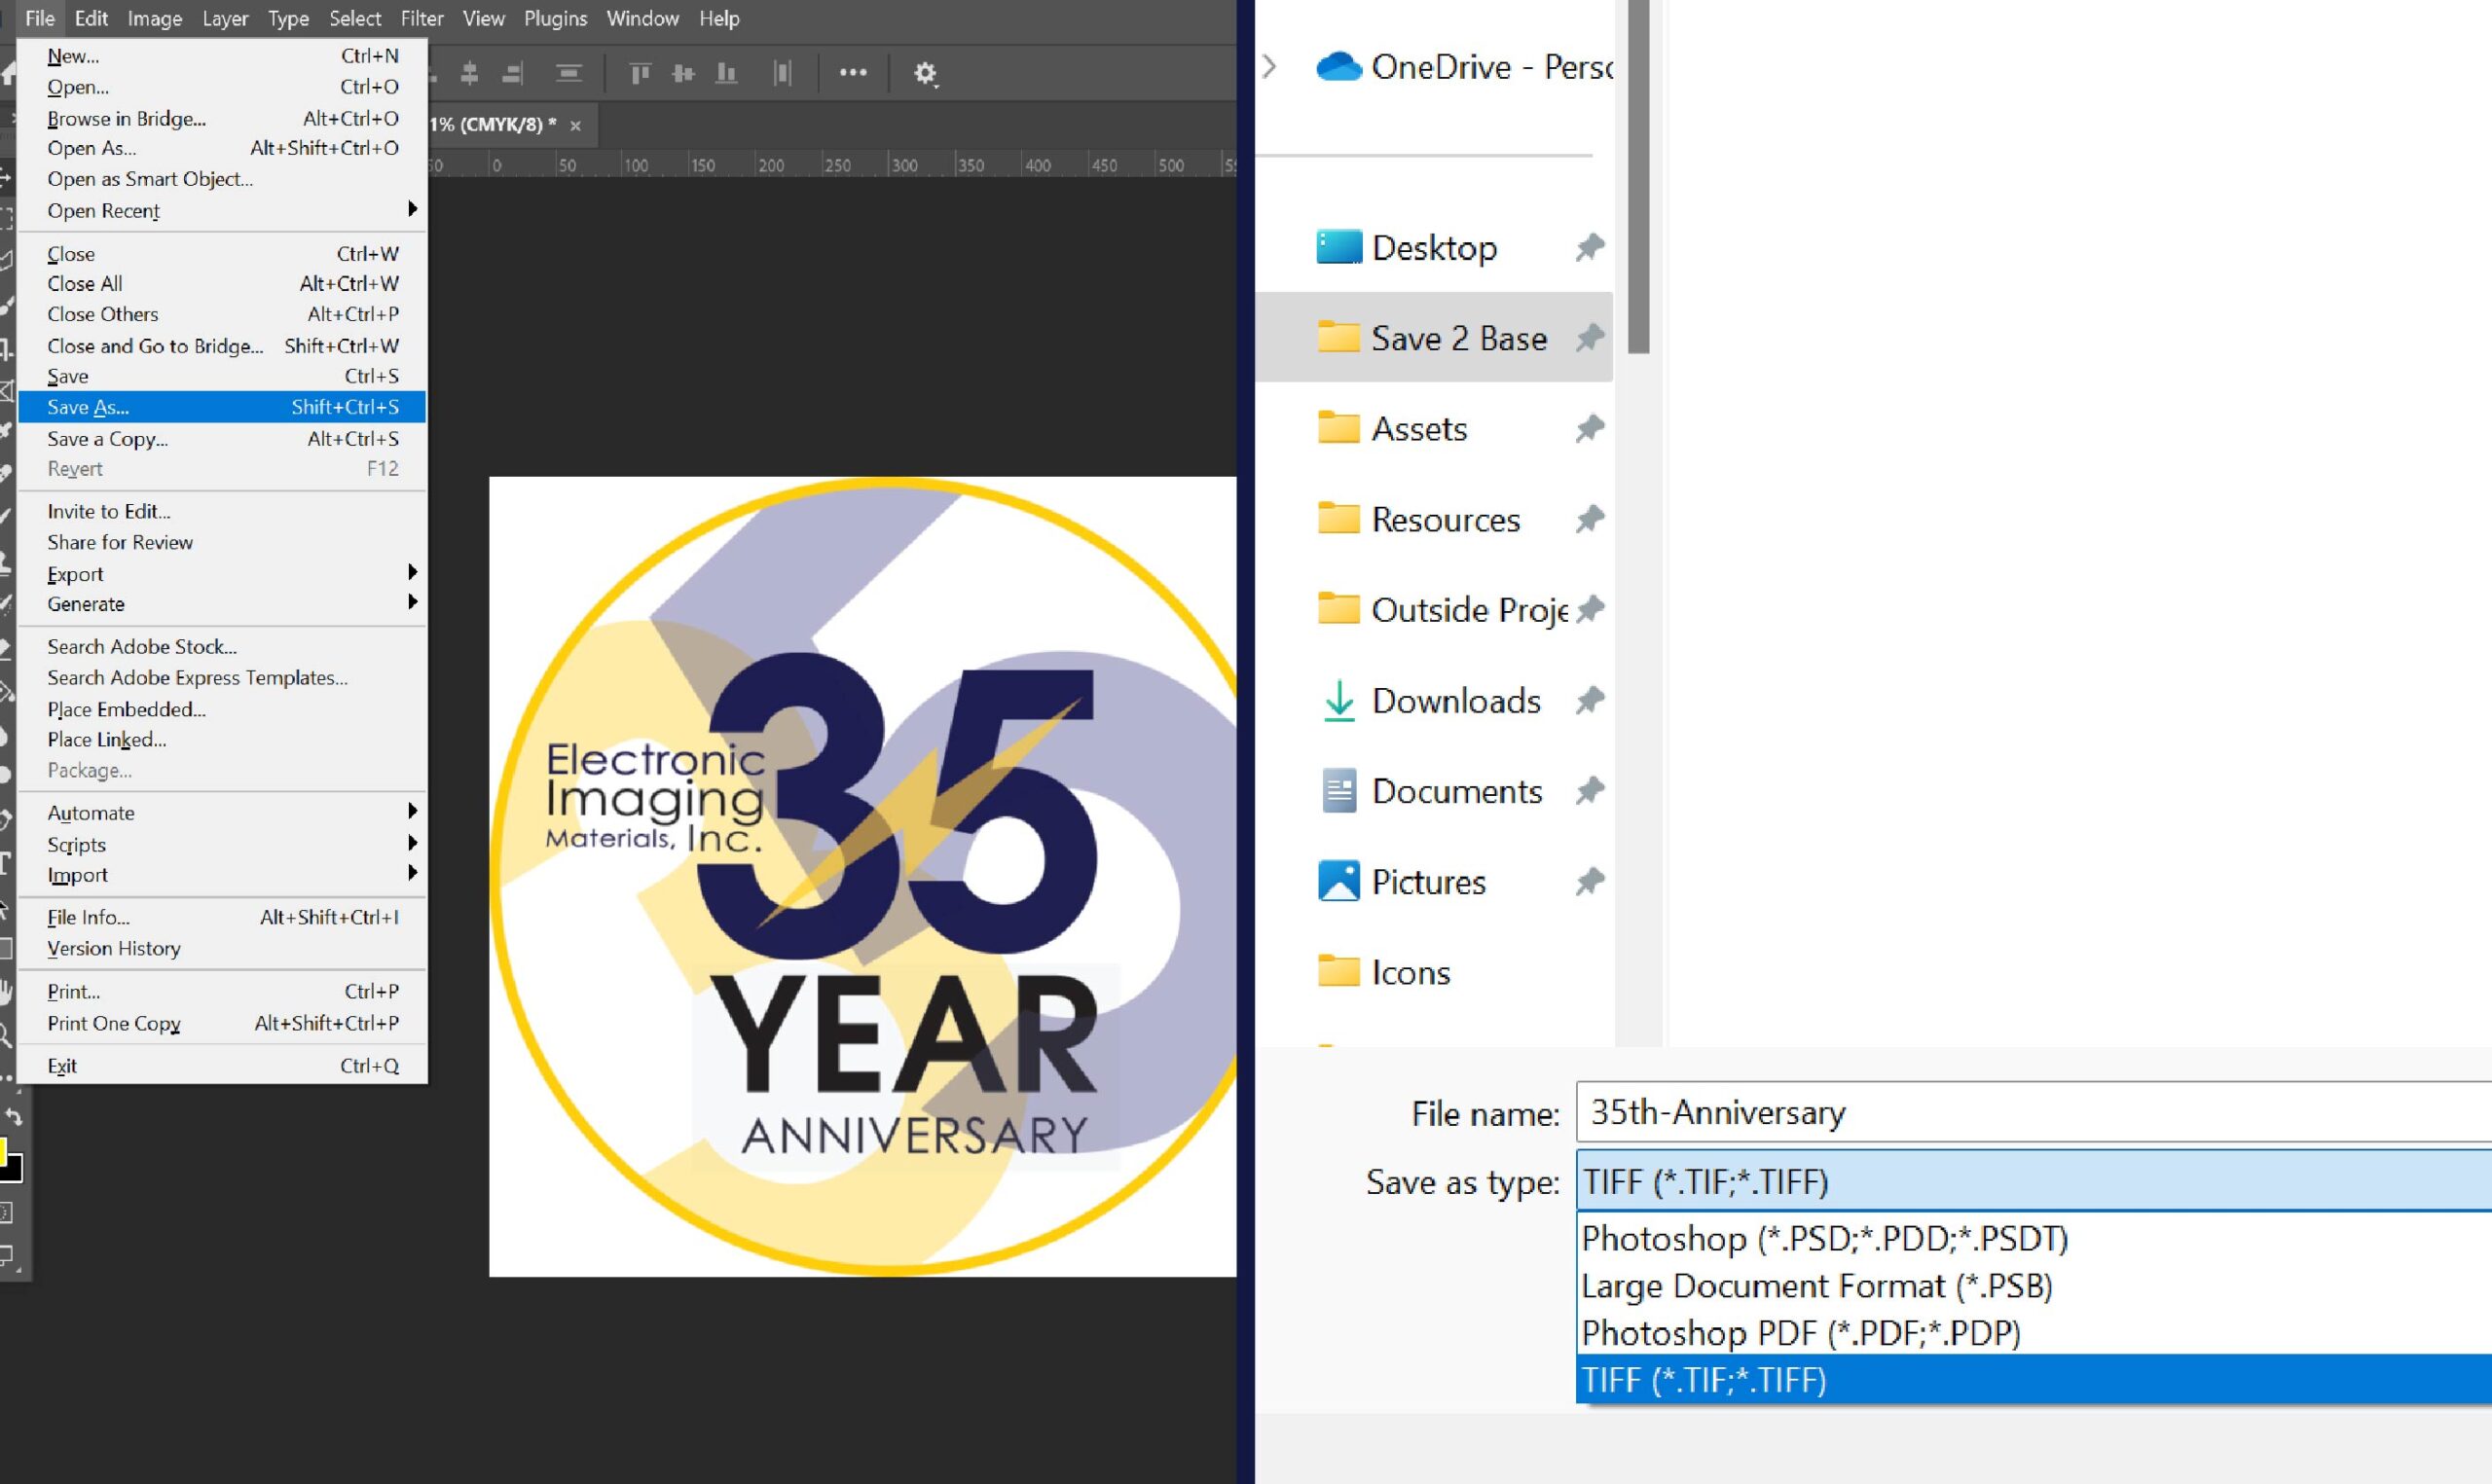
When saving go to File, Save As; Tiff. For a file name, use the product name as stated on your order.
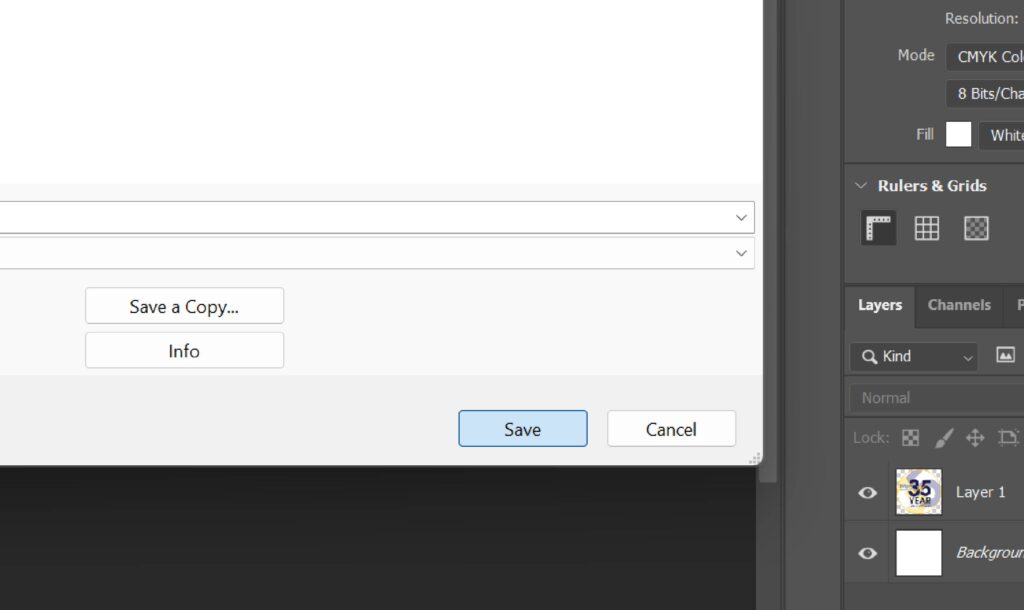
Click SAVE and then file is ready to email.
