Adjusting Darkness
Calibration
Adjusting Darkness with the Seagull Driver:
If you are using the Seagull driver and having poor print quality you can follow these steps to adjust the darkness (heat) of your printer below.
Click to learn more
- Go to Settings > Bluetooth & devices > Printers & scanners.
- Click on your printer and select “Printing Preferences”.
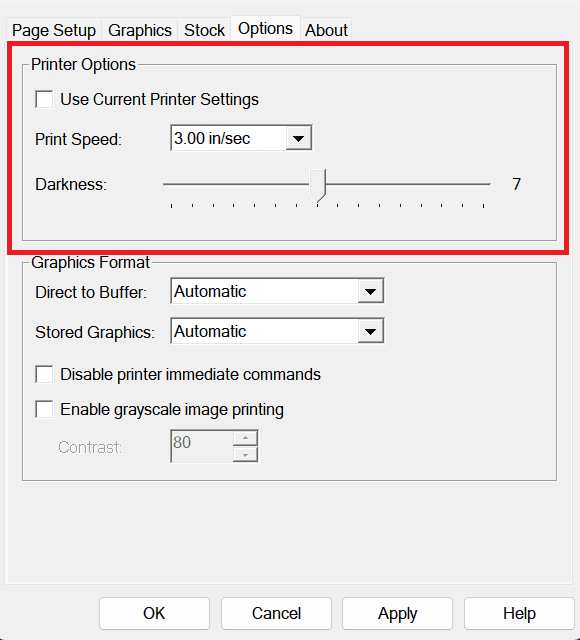
- Go to the options tab and deselect “Use Current Printer Settings”.
- From here you should be able to adjust your darkness level.
Note: Zebra printers will have an additional option. EIM recommends using the “Absolute” option rather than “Relative” for consistent printing.
Adjusting Darkness with the ZDesigner Driver:
If you are using the ZDesigner driver and having poor print quality you can follow these steps to adjust the darkness (heat) of your printer.
Click to learn more
- Go to Settings > Bluetooth & devices > Printers & scanners.
- Click on your printer and select “Printing Preferences”.
- Go to the options tab and locate “Darkness”.
- From here you should be able to adjust your darkness level with the drop down menu

Adjusting Darkness through BarTender® with the Seagull Driver:
If you have an existing template with poor print quality you will need to adjust your darkness (heat) level within BarTender®. Follow these steps.
Click to learn more
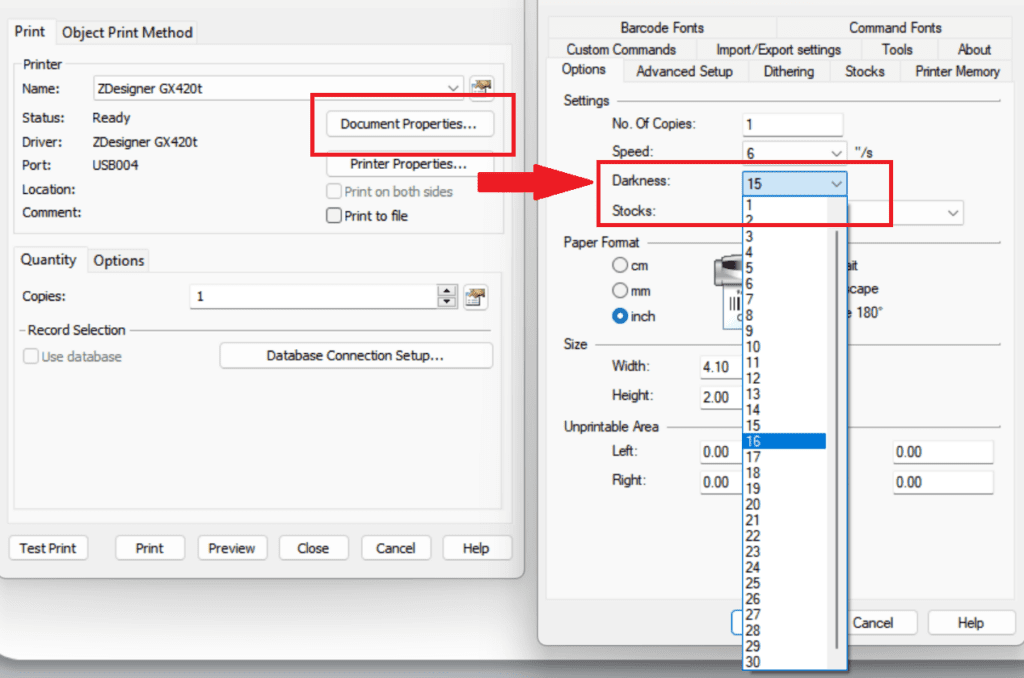
- Open the print dialog (ctrl + P).
- Click document properties.
- Go to the options tab and deselect “Use Current Printer Settings”.
- From here you should be able to adjust your darkness level.
Note: Zebra printers will have an additional option. EIM recommends using the “Absolute” option rather than “Relative” for consistent printing.

Adjusting Darkness through BarTender® with the Zebra Driver:
If you have an existing template with poor print quality you will need to adjust your darkness (heat) level within BarTender®. Follow these steps.
Click to learn more
- Open the print dialog (ctrl + P).
- Click document properties.
- Go to the options tab and locate “Darkness”.
- From here you should be able to adjust your darkness level with the drop down menu.
Calibrating Printers with the Seagull Driver:
An easy way to calibrate your printer is through the Seagull Driver! Follow these steps to calibrate your printer.
Click to learn more
- Go to Settings > Bluetooth & devices > Printers & scanners.
- Click on your printer and select “Printer Properties”.
- Go to the tools tab.
- Click Action > Run Calibration.

Note for TSC printers
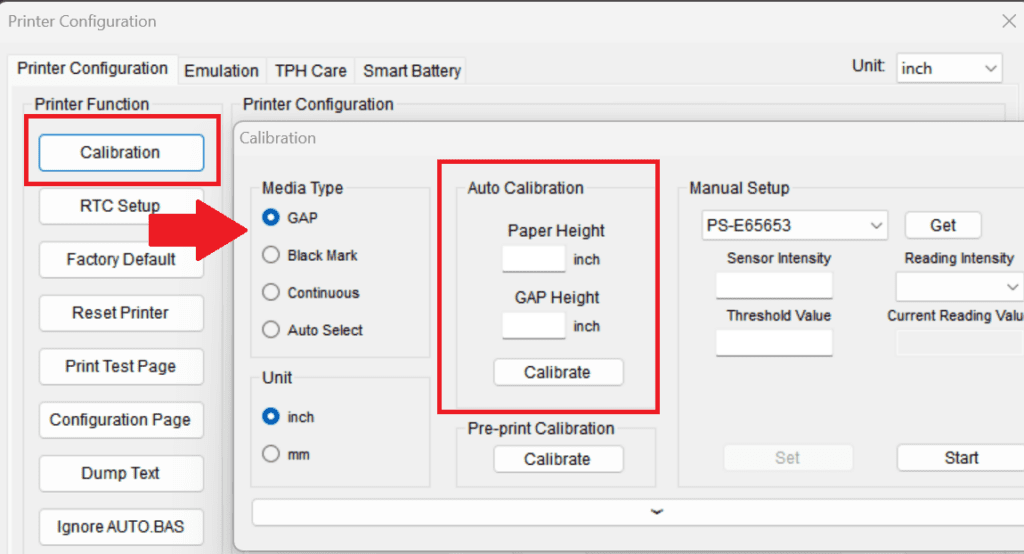
If the step above doesn’t work with your TSC printer, you’ll have to use the TSC Console found here:
- Add the printer by clicking the icon with a printer with a + over it.
- Check/Select the printer you want to calibrate.
- Go to Functions > Calibration.
- Under Media Type choose the correct type of label.
- Under Auto Calibration click Calibrate.